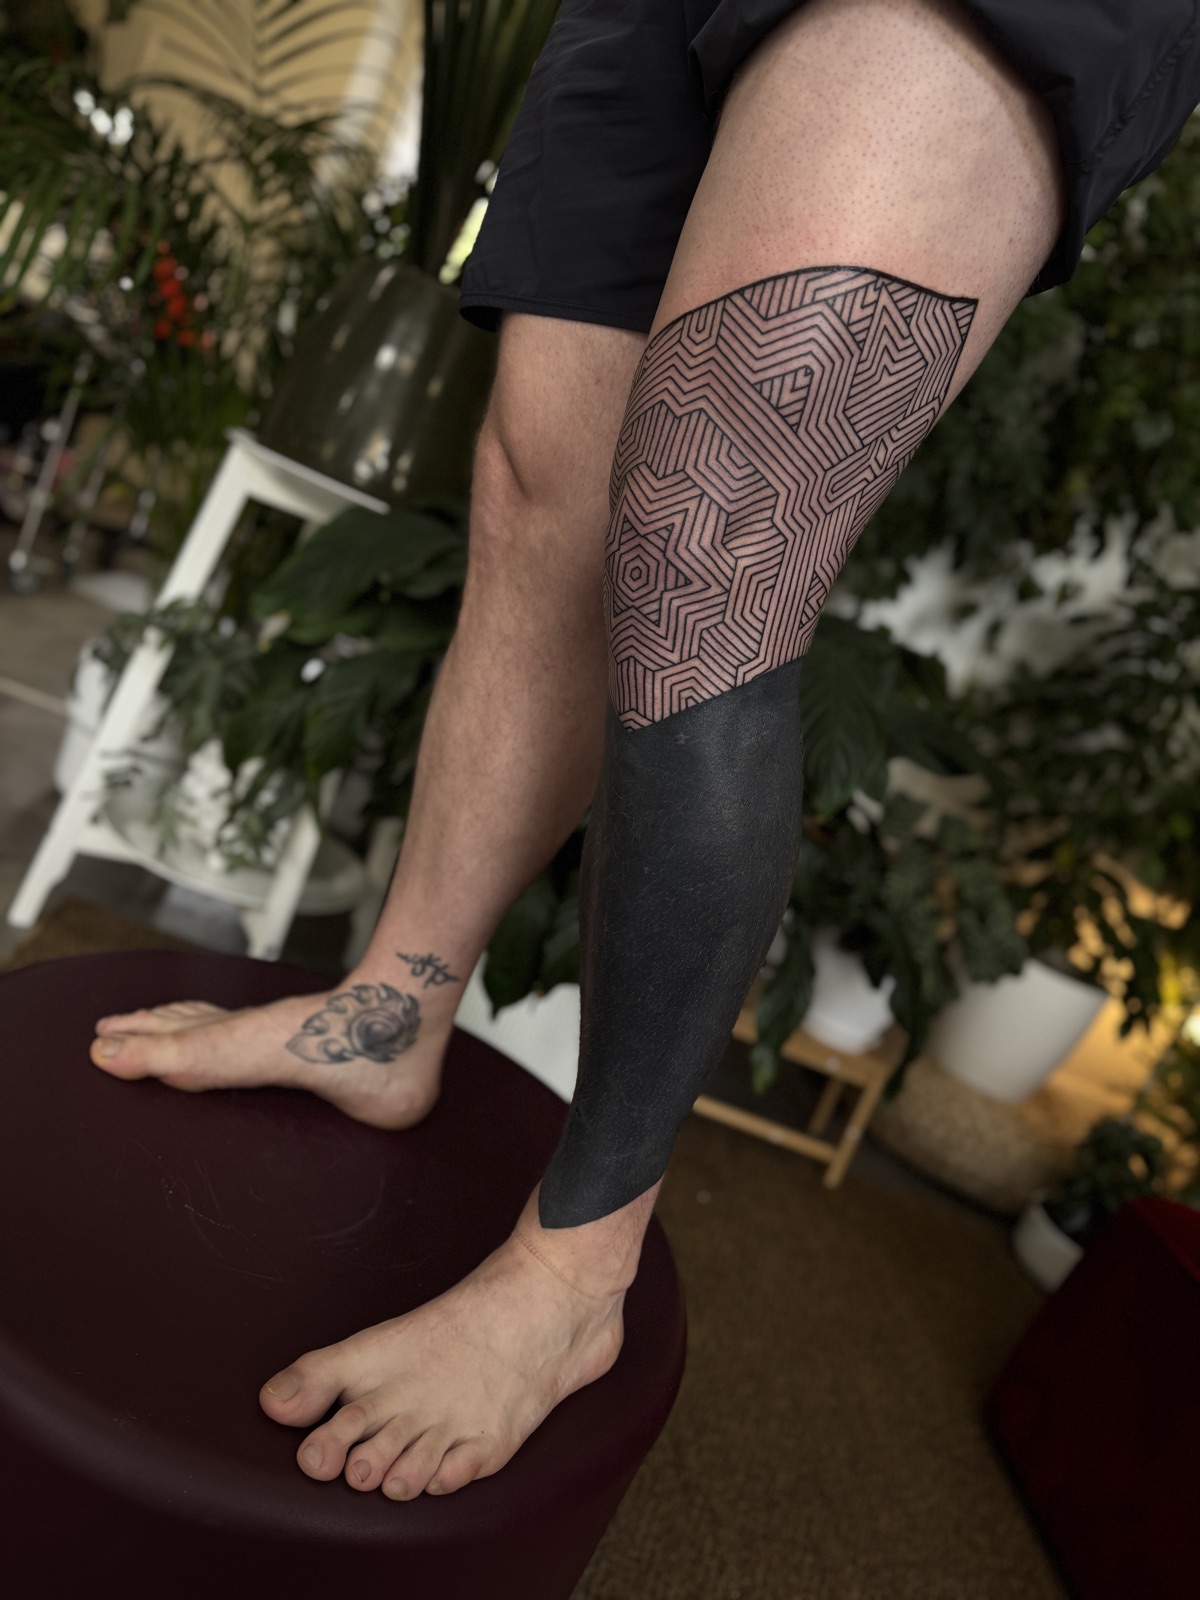
Blackwork and blackout tattoos look incredible. They're also a pain to heal. When you cover a large area of skin in solid black, your body has a lot more work to do than it would with a small line piece. With the right routine, a heavy blackwork piece heals clean with barely any touch-ups.
Over the years I've healed plenty of my own blackouts and walked plenty of clients through theirs. Here's how I do it, step by step. I've also included several of my own videos throughout, including a full day-by-day of one of my own arm blackouts, so you can see exactly what I'm talking about as we go.
Why blackwork needs special attention
A blackout or large blackwork tattoo is essentially a big open wound. The more skin that's been worked, the more your body reacts, which usually means more swelling, more fluid, and a longer healing window than a smaller, lighter tattoo.
That doesn't mean it's complicated. It mostly comes down to two things: managing the swelling in the first few days, and keeping the tattoo clean and protected while it peels. Get those right and you're most of the way there.
In the video below I walk a client through the whole process right after finishing his fresh blackout piece. It's a good visual companion to everything in this guide.
The first few days: managing swelling
The first 24 to 72 hours are when swelling peaks, especially on arms, hands, and anywhere near a joint. If your hand or wrist is involved, be prepared, it can swell up significantly, sometimes doubling or more in size before it calms down.
Here's what actually helps:
- Rest and take it easy. Try to stay home and relax for the first week if you can. This is not the time to be doing physical work, climbing, lifting, or anything that strains the area. Your body heals best when it isn't fighting you.
- Keep the area elevated. This is the single most effective thing you can do for swelling. Build yourself a little setup out of pillows so you can keep your arm raised, while you're resting during the day and while you sleep at night. The idea is to stop blood and fluid from rushing down and pooling in the tattoo. When you first lower your arm after keeping it up, you'll often feel a painful pulsing, that's your cue that elevation was doing its job.
- Use ice compresses. A few times a day, lay an ice pack over the tattoo to bring the swelling down. Always put a layer of cling film over the tattoo first so you're never putting ice directly on broken skin.
The very first clean (right after your session)
There are two separate things people often mix up, so let's be clear. The hot-then-cold shower is a one-time thing you do right after the session, not something you repeat every day.
When you get home from the studio:
- Wash your hands.
- Take off the wrap (your initial cling-film wrap only needs to stay on a short while).
- Get under a warm-to-hot shower, hot enough to be comfortable, never hot enough to burn yourself.
- Wash the tattoo gently for about 10 minutes. The warmth opens the pores and lets you give it a proper clean. Use a normal, gentle soap, nothing antibacterial. A regular mild soap is best.
- Rinse with cold water straight away to close the pores back up.
- Dry it with paper towels, not a regular bath towel (which carries bacteria and loose fibres), then let it air dry.
For the first night only, you can re-wrap it with a fresh absorbent pad. After that, leave it unwrapped.
Your daily cleaning routine
From there on, cleaning is simple but it needs to be consistent. Clean the tattoo three times a day, morning, around 2–3 in the afternoon, and in the evening before bed.
For the daily routine I use a cleansing foam (Hustle Bubble Deluxe is my go-to, but any mild cleansing foam works). Gently foam-clean the whole tattoo, then wash it off with a wet paper towel or just water, and dry it with paper towels, tapping it dry and making sure there are no wet spots left. That's it. You don't need a 10-minute hot shower every time; that long warm wash is only for the very first clean after the session.
If you ever don't have foam to hand, you can simply rinse it with water and a regular gentle soap and dry it with paper towels. The consistency matters more than the product.
Dry healing: the core of blackout aftercare
For a heavy blackwork piece, my go-to approach is dry healing for the first week or so. That means: keep the tattoo as clean and as dry as possible, and do not moisturise it at all in the early stage.
Why? If you start putting cream or oil on too early, you can clog the freshly worked pores and invite infection. Keeping it dry lets a very thin, protective layer form over the tattoo while it settles.
What you're aiming for is a thin, even peel, not thick, scabby crusts, and not deep cracks. A little dry, slightly cracking skin is normal. Big scabs and deep cracks are not what you want. Areas that move constantly, like the inside of the wrist or the elbow ditch, are more prone to getting scabby and may occasionally need a small touch-up later. That's just the nature of skin that bends all day, nothing to panic about.
In my experience, after about a week of dry healing the tattoo looks settled enough that the risk of infection drops right off, and you can usually get back to normal activity from there.
When and how to start moisturising
Once the tattoo starts peeling really nicely, that thin, even flaking, you can begin to moisturise. My choice is natural coconut oil, and here's a money-saving tip: the coconut oil from the cooking aisle is exactly the same as the expensive cosmetic versions. Same product, fraction of the price. Just make sure it's natural with nothing else added.
Apply it the clean way: scoop a little onto a clean spoon, then use clean hands to rub a very thin layer over the tattoo. A couple of times a day is plenty. Do not over-moisturise, a heavy, greasy layer does more harm than good.
A quick note from my own experimenting: on one arm I started gently moisturising on day three instead of fully dry healing, just to see the difference. Starting earlier kept the peeling skin a bit more flexible and let me move my arm more freely and comfortably while it healed. It came out great. That said, for most people and most heavy blackouts, I still recommend leaning on dry healing first and introducing oil once the peeling is underway.
One more important rule once it's peeling: don't pick the flakes. Let them fall off on their own. Picking can pull ink out and slow the heal. Yes, there will be little black flakes everywhere, on your bed, your sofa, your carpet, your yoga mat. It's gross but completely normal. Just let it happen.
What it actually looks like day by day
If you want to see a full heal from fresh to finished, I filmed daily updates on one of my own arm blackouts. Here's how it typically unfolds.
Days 1–2 are the swollen, tender stage. The hand sits noticeably bigger than your other one, and that pulsating pain when you lower your arm is at its worst, so keep it elevated. By day two the sharp pain usually starts easing off.
Days 3–5 the swelling settles enough that you can wear a normal t-shirt again, and the top layer of skin starts to crack and peel slowly. It feels tight, like a shell over your arm, so move gently to avoid cracking it. You're still dry healing and cleaning three times a day here.
In this video I take you through days 1 to 5 of my own blackout, including my full dry-healing routine and a tip for what to do right after the session:
Days 6–11 are the big peeling stage, flakes everywhere. Around day six, once the skin is mostly peeling, I start adding a thin layer of coconut oil to the parts that are ready (leaving any still-tender spots alone for another day or two). The arm heals from the top down toward the hand, and the wrist area takes the longest every time, expect a few tiny flakes and a little sensitivity there after the rest has settled.
By somewhere around a week and a half I'm usually back to full function, and by roughly two weeks it's essentially healed. Part two of my day-by-day covers days 6 to 11:
The whole heal took me about two weeks. There were a few ups and downs, some days a bit more painful than others, but every time I stuck to the routine and just let it heal, it was fine.
Healing a blackout on a sensitive spot (like the nipple)
Some placements make people nervous, and the nipple is top of that list. I got mine blacked out and filmed the whole heal day by day, so here's what it's actually like.
The pain first, since that's what everyone asks. The nipple was numbed with a numbing cream before it was tattooed, and I couldn't feel a thing. It was the easiest part of the session.
The healing is the part people worry about most. A lot of people told me the nipple would be the worst place to heal. It wasn't. It healed exactly like any other blackout: dry heal the first few days, clean it morning and night, a little coconut oil once it started peeling, and by two weeks it was done. Same routine as the rest of this guide.
One thing worth flagging for any fresh tattoo, and I learned it on this one: never use masking tape on your skin. I didn't have the proper stuff at home and used masking tape to hold a pad on the first night. I got an allergic reaction around the edges, itchy and red for a couple of days. Use proper medical tape to hold the pad, never masking tape.
And if a pad ever sticks to a fresh blackout, don't pull it off. Get in the shower and let the water soak it loose, then peel it away gently. Pulling a stuck pad off fresh skin can really hurt.
Here's the full two-week day-by-day of my nipple blackout:
Diet, hydration and healing from the inside
People underestimate how much your overall health affects a heal. Your skin is repairing itself, and it needs support.
What I do, and what I recommend:
- Drink bone broth (or beef broth). It's loaded with collagen, which is brilliant for skin repair. I'll often drink it daily, sometimes starting a couple of weeks before a big session and continuing through the heal.
- Eat anti-inflammatory. I try to cut out inflammatory foods while healing, no seed oils, no heavily processed sugar. The cleaner you eat, the better tattoos tend to settle.
- Consider supplements. I like organ supplements such as kidney and liver capsules, they're packed with the vitamins and minerals your body wants when it's repairing itself.
- Take electrolytes and stay properly hydrated, especially in hot weather.
- Sleep well. Proper rest at night genuinely shows up in how cleanly a tattoo heals.
Healing in hot weather
Heat and sun are the enemy of a fresh blackout. A heatwave makes everything harder, more sweating, and the constant risk of sun hitting the tattoo. If you're healing in summer, your job is to keep that tattoo out of the sun completely and stay on top of your hydration and electrolytes.
In this next video I'm healing one of my own blackout pieces during a heatwave, and you can see the flaking stage in real time along with how I managed it.
What to avoid while it heals
Treat your tattoo like the open wound it is. Until it's fully healed and settled, avoid:
- Sweaty exercise and the gym, sweat and friction are an infection risk.
- Swimming pools, saunas, and steam rooms, soaking and bacteria are a bad combination.
- Sun exposure, no direct sun on the fresh tattoo, full stop.
- Scratching. It will get itchy, every tattoo does. Never scratch it. If you need relief, gently tap around the tattoo. It's not perfect, but it's far better than scratching.
- Strenuous movement and sweating. Light, gentle stretching to keep your body moving is fine, but nothing that makes you sweat and nothing that stretches the skin enough to crack the peeling layer. No push-ups, no heavy lifting.
- Pets. This one catches people out. A dog or cat can scratch or lick a fresh tattoo in a split second and cause an infection. Keep them away from the area and wear a long sleeve as a barrier if they're jumpy.
- Re-wrapping it long term. After that first night, keep it clean and unwrapped. Letting it breathe is part of how it heals.
The most common question I get is "when can I go back to the gym / swim again?" The answer: when it's fully healed and settled down. There's no shortcut worth the risk of ruining a piece you sat through hours of work for.
A lighter blackwork or dotwork piece
Not every blackwork tattoo is a full blackout. If yours is mostly dotwork or lighter blackwork, the healing is gentler and the routine is a little simpler, though the core principles are the same.
For a lighter piece, the wrap usually only needs to stay on for a couple of hours. After that it's the same idea, the one-time hot-then-cold shower wash, then gentle cleaning three times a day, dry with paper towels, and a very thin layer of coconut oil two or three times a day once it's ready. You won't deal with the same dramatic swelling you get from a full blackout, and there's less risk of heavy bleeding overnight (though a little fluid on the bedding the first night is normal, old sheets are your friend).
In this video I walk a first-timer through aftercare on a lighter dotwork-and-blackwork piece, which is a good watch if your tattoo is on the lighter end.
The short version
If you only remember this much, you're fine:
- After the session, do the one-time hot shower wash, cold rinse, dry with paper towels. Re-wrap the first night only.
- Clean three times a day with a gentle cleansing foam (or water and mild soap), drying with paper towels.
- Dry heal the first week, no moisturiser, keep it clean and dry. Don't pick the flakes.
- Once it's peeling nicely, switch to a thin layer of natural coconut oil a couple of times a day.
- Support the heal from the inside with bone broth, electrolytes, clean food, and good sleep.
- Avoid sun, sweat, gyms, pools, saunas, and scratching until it's fully healed.
- For full blackouts specifically, keep the area elevated and iced (over cling film) for the first few days to control swelling.
- Treat it like an open wound the whole way through.
One last thing
A blackwork tattoo is a big piece of work, so it needs proper aftercare. None of it is complicated though. Manage the swelling early, keep it clean and dry, feed your body well, be patient through the peeling, and don't rush back to the things that put it at risk. Do that and your blackwork settles dark and clean, exactly how it should.
If you've got questions about your own heal, drop them in the comments on any of the videos above, I answer them there.
Still deciding whether to get one? I've written about what a blackout is, what it costs and how it heals.